Arduino Laser Tag Update #4

PCB Etching and Soldering Components

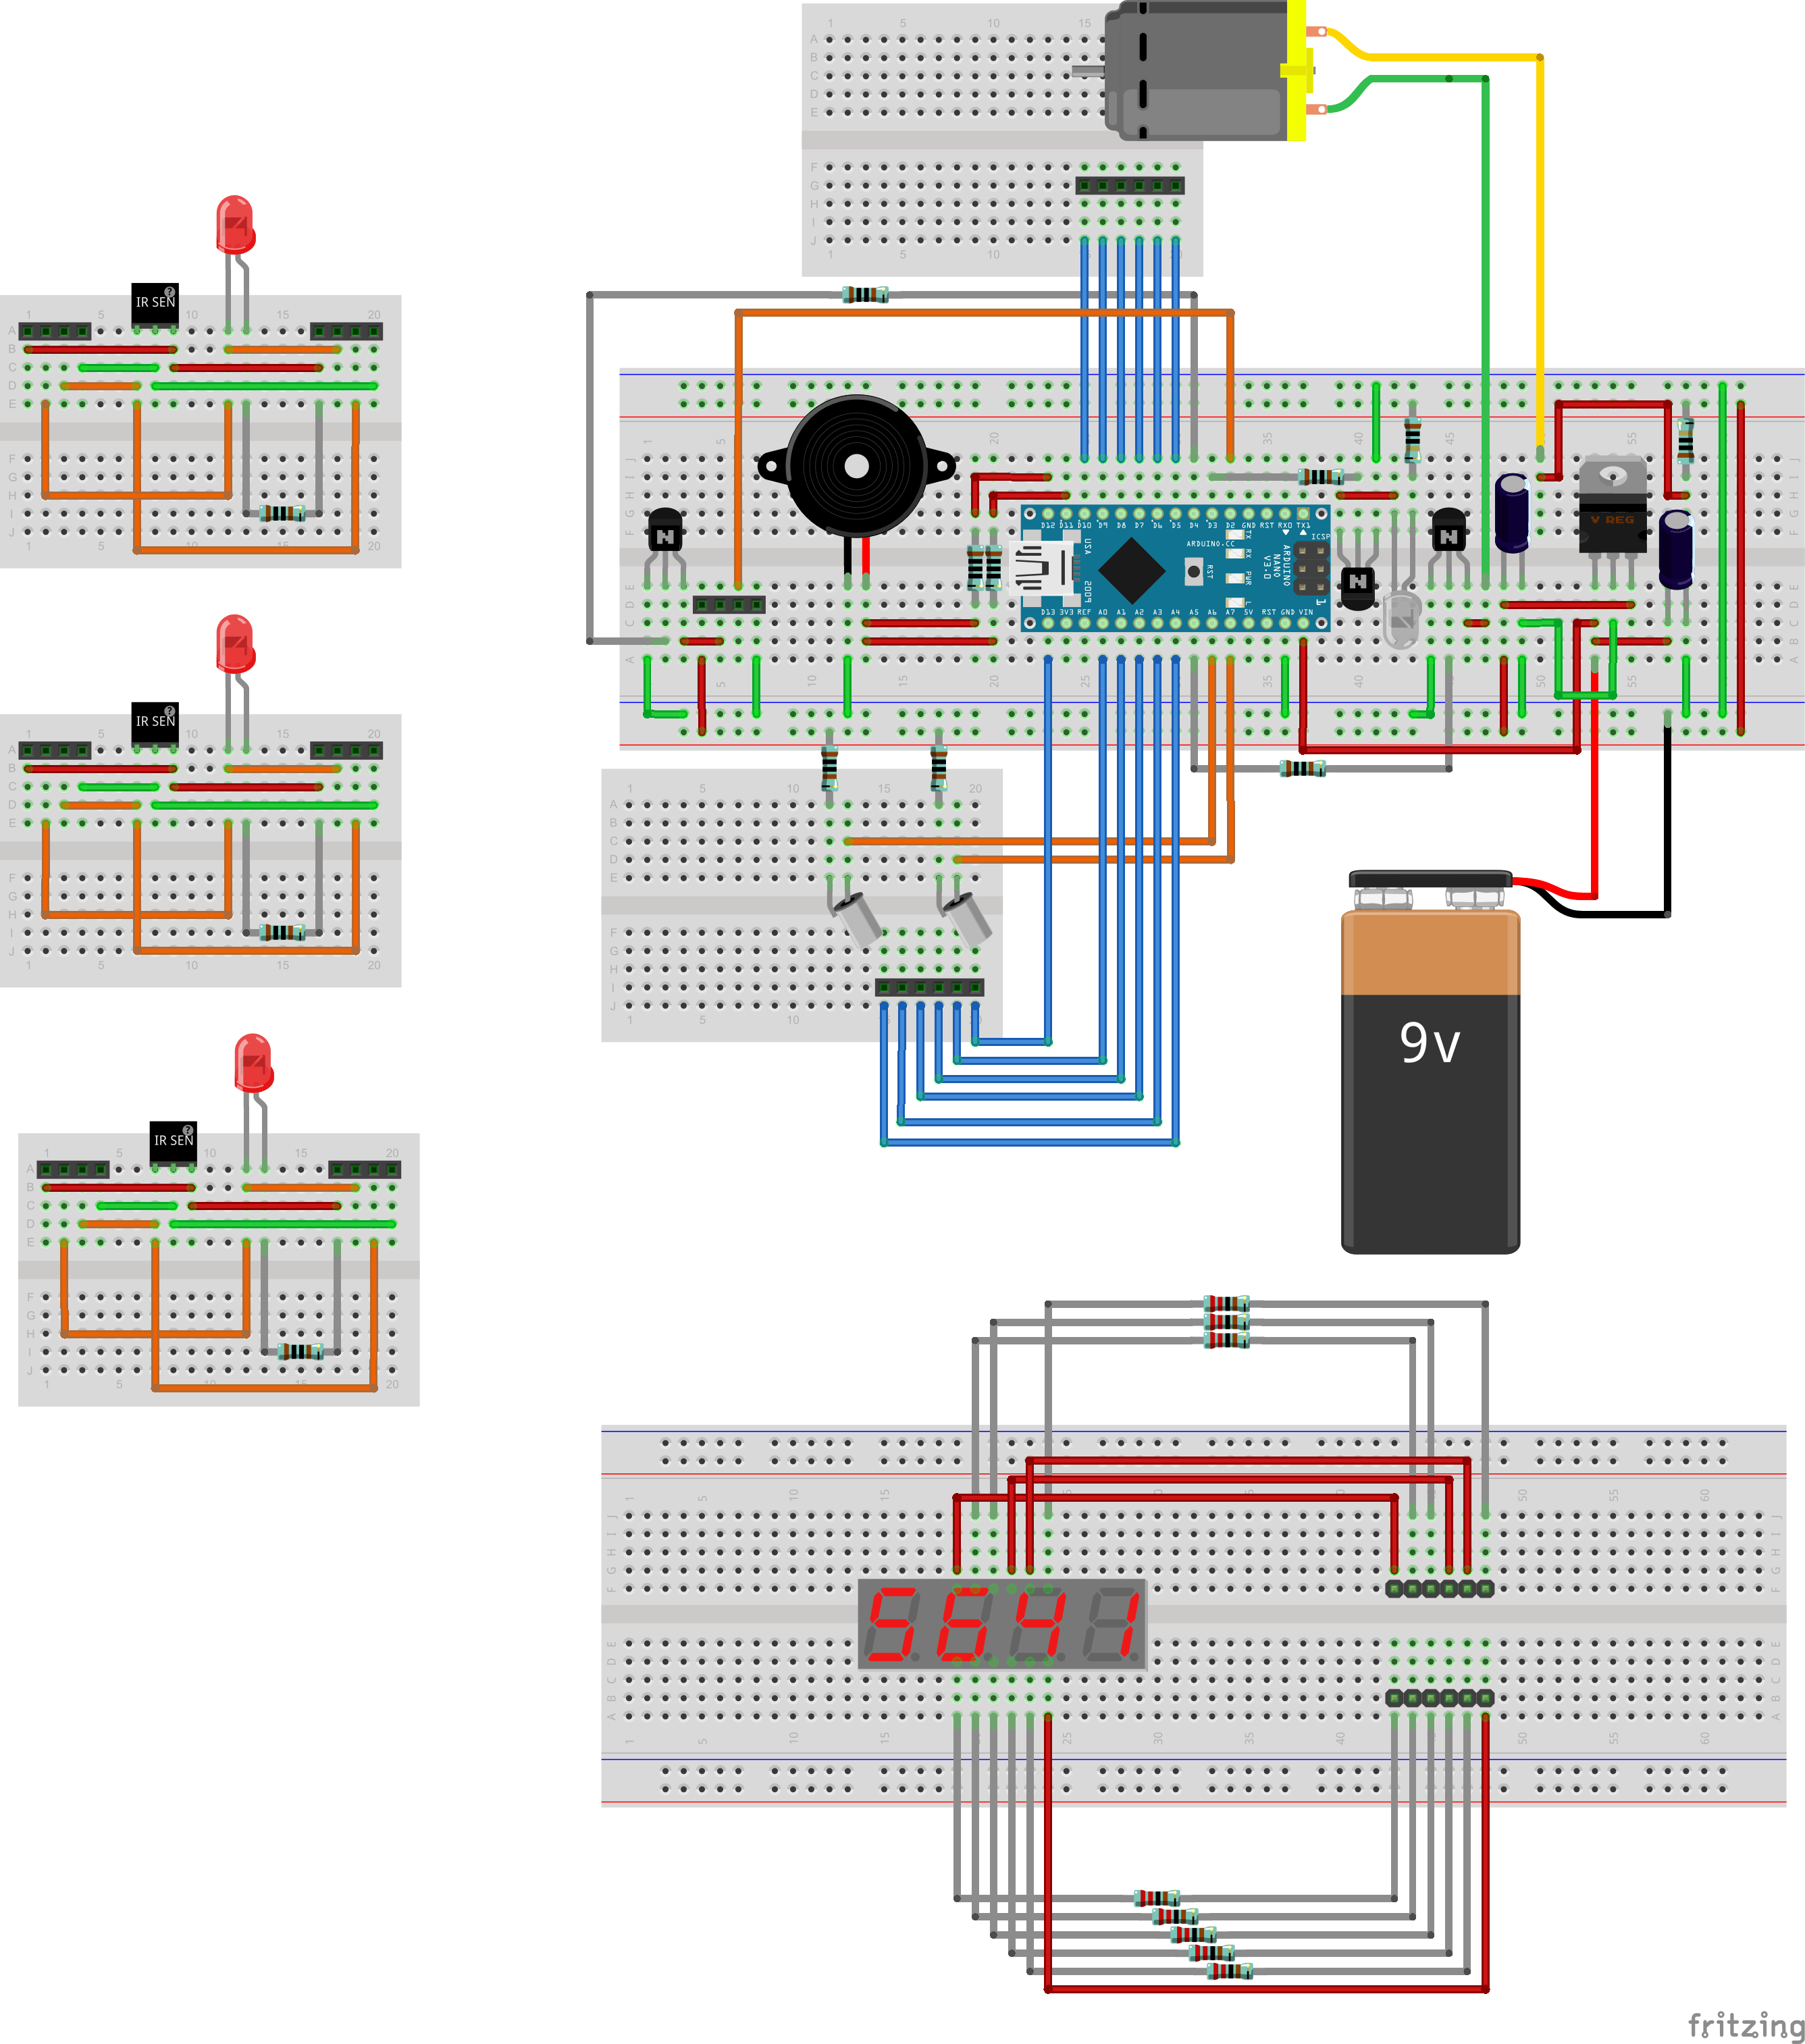
After working on this project for the past couple of days, I was finally able to fit everything neatly onto a printed circuit board. The breadboard is great for testing an idea, but the wires can get a bit messy as the project becomes more complex. I etched the PCB boards using the tonner method for the mask and ferric chloride as the etchant. With that said, there are a couple of changes I made to the wiring itself. Most of these changes were made to allow components to fit better with the laser tag gun. The process of making these boards begins with a breadboard diagram.

Electronic Schematic RevA_bb

Next, a wiring diagram was made from the connections on the breadboard. It makes the wiring connections easier to read.

Electronic Schematic RevA_schem

Finally the PCB board components were laid out. I used a ground fill to save as much etching as possible.

Electronic Schematic RevA_pcb

The final result.

PCB front

PCB Back

PCB Complete

2 thoughts on “Arduino Laser Tag Update #4

  1. firstly, Thank you for taking the time to post all the info and share.
    I am looking at building this project as a bonding experience with my 16year old son.
    using your part list, I ordered the parts from Aliexpress and 35days later all but the buttons have arrived.
    However as a newbie (I have only some programming experience no electronic), I am feeling overwhelmed.
    This update #4 seems different and more complicated than where you started from.
    So my question is
    1. Do you have and are willing to share your sketch (Andrino micro code) ?
    2. In Update #4 You have images and circuits of your core, IR receivers and LCD shown separately. How to they attach to each other? i.e J4 connect to TOP, J5 or J3 to J9 etc.
    3. Does your published part list have all the parts in your #4 update, I see you have attached a motor or something. I suspect it vibrates the gun on a hit.
    4. Any advice to a newbie wanting to follow your plans. I am fine going back and building what you have in Update #3, as long as we have everything. For now I am looking how I can match the part list to the schematics as well as the image.
    Once again I appreciate all the effort you have gone through.
    Thanks in advance for any help or advice.
    cheers

    • 1. I do have the code available, although not completely finished. I’ve been pretty busy with my new job so I will post it as soon as I can in the next update.

      2. The IR receivers are indeed separated. The idea is to attach them on a vest. There should be 4 header pins on the pcb next to the regulator reserved for this.

      3. No the list is no longer complete. The motor is for haptic feedback so it is optional. It came with the toy gun that we brought.

      4. I would say to keep working at it. As soon as I finish the first gun I will post a better written tutorial. For now it will just be updates, which will not be complete as things change.

      Good luck!

Feedback

Fill in your details below or click an icon to log in:

WordPress.com Logo

You are commenting using your WordPress.com account. Log Out /  Change )

Twitter picture

You are commenting using your Twitter account. Log Out /  Change )

Facebook photo

You are commenting using your Facebook account. Log Out /  Change )

Connecting to %s